
Crafting the perfect Peri Peri Chicken at home is simpler than you think. I’ve honed a straightforward method that guarantees flavor without the fuss, including essential ingredients and substitutes.
Key tips ensure a perfect spice-tang balance, while unique serving suggestions transform it into an extraordinary meal.
Discover how to elevate your Peri Peri Chicken into a memorable dining experience.
Peri Peri Chicken

Peri Peri Chicken, with its fiery flavor, quickly becomes a favorite for anyone who tries it. I remember the first time I tasted it; the blend of spices and the tender chicken left an unforgettable mark on my palate. It’s not just the heat that draws you in, but the depth of flavor that accompanies it. Each bite is a journey through a well-balanced mix of tangy, spicy, and slightly sweet notes.
I’ve come to realize that making Peri Peri Chicken at home isn’t as daunting as it might seem. It’s all about marinating the chicken in a special blend of spices to achieve that signature zest. The longer I let the chicken marinate, the more intense and satisfying the flavors become. Grilling the chicken then brings out a smoky char that complements the spicy marinade perfectly.
What I love most about this dish is its versatility. It can be the star of the show at any barbecue or a comforting weeknight dinner. It’s a recipe that’s not only packed with flavor but also brings a bit of adventure to the table. Every time I make it, I’m reminded of why it’s become such a hit in my household.
Ingredients You’ll Need (+ Possible Substitutes)
Diving into the world of Peri Peri Chicken, let’s break down the must-have ingredients and some clever swaps to whip up this fiery delight.
Starting with the star of the show – chicken. I’m all in for thighs because they’re just so tender, but if you’re watching the calories, chicken breasts are a solid choice too. When it comes to crafting that signature Peri Peri sauce, nothing beats fresh chili peppers. But hey, if they’re playing hard to get, a mix of red pepper flakes and a dash of sweet paprika can save the day, bringing in that spicy punch. The trio of garlic, lemon juice, and olive oil lays the groundwork for our marinade. Found yourself garlic-less? A sprinkle of garlic powder can be your stealthy stand-in.
Let’s talk herbs. Oregano and parsley bring their A-game to the sauce, rounding out the flavors. If your garden’s looking a little bare, reaching for the dried versions is totally fine. And of course, you can’t forget the essentials – salt and pepper to taste. Feeling bold? A tablespoon of vinegar or even a splash of whiskey tossed into your marinade promises an unforgettable twist.
How To Make It

Let’s jump right in and start making our mouthwatering Peri Peri Chicken, kicking things off with the marinade. I grab some fresh chili peppers, garlic, a squeeze of lemon juice, and a handful of herbs and blend them all together to whip up this fiery, tangy concoction. It’s important to give it a taste and tweak the spiciness to just how you like it. I prefer to let the chicken bathe in the marinade overnight to ensure it’s fully infused with those bold flavors, but if I’m pressed for time, a few hours will suffice.
When it’s time to cook, I crank my oven up to a nice and hot 400°F (200°C), aiming for that perfect crispy finish on the chicken. I spread the chicken pieces out on a baking tray, being careful not to overcrowd them so they cook evenly. I’ve discovered that brushing a bit more of the marinade on the chicken while it’s baking really amps up the flavor.
Once the chicken turns a gorgeous golden brown and the juices are clear—about 45 minutes in—I pull it out of the oven. Giving it a few minutes to rest is crucial; it helps retain all those lovely juices, ensuring every bite is delightfully tender. And there you have it, my version of Peri Peri Chicken, sure to be a hit at any meal.
Tips For Success
Having walked through how to make Peri Peri Chicken, I’m excited to share some essential tips to ensure your dish is a hit every single time. Let’s dive into the magic of marinating first. The secret is, the longer you marinate your chicken, the more intense and delightful the flavors will be. Personally, I aim to marinate for at least 24 hours in the fridge. If time isn’t on your side, squeezing in a minimum of 2 hours can also do the trick, but believe me, the wait is absolutely worth it.
Now, let’s talk about the cooking method, because it’s crucial. Whether you’re basking in the sunshine grilling outdoors or cozied up inside with a grill pan, achieving that charred, smoky flavor is what makes Peri Peri Chicken genuinely authentic. Make sure your grill or pan is sizzling hot before you lay down your chicken to ensure those gorgeous grill marks.
And here’s a game changer – don’t cut corners with your ingredients. Quality really does make a world of difference:
- Opt for fresh lemon juice instead of the bottled stuff
- Invest in high-quality olive oil
- Use fresh garlic and herbs
Trust me, these little details will elevate your Peri Peri Chicken from good to unforgettable.
Serving Suggestions
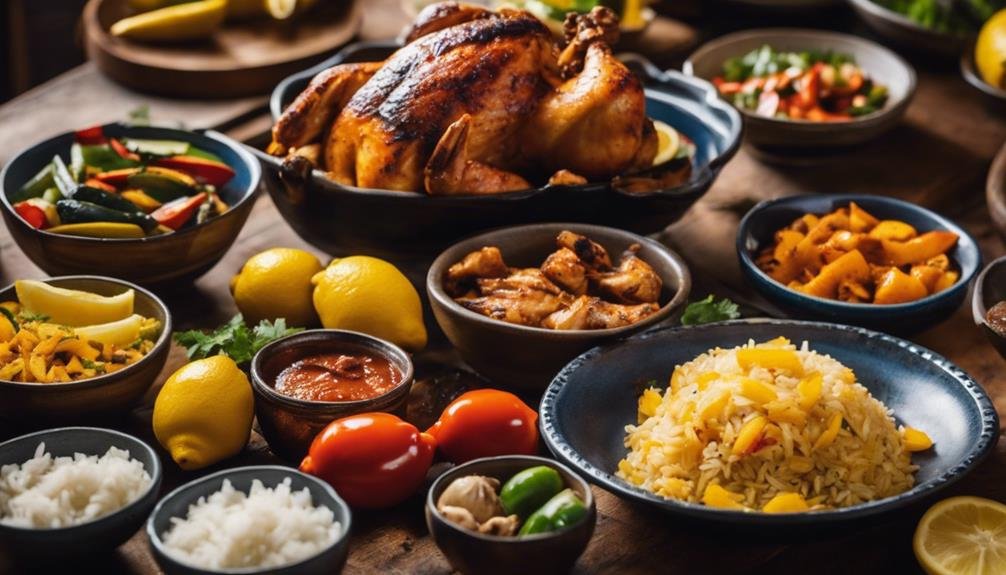
When you nail the recipe for Peri Peri Chicken, picking the perfect sides can elevate your dinner into something unforgettable. That spicy kick from the chicken works wonders with dishes that either cool it down a bit or match its fiery spirit. For a well-rounded meal, I always turn to a crisp, fresh salad. It’s not just about the crunch; it’s about how those greens can soothe the spiciness.
And of course, I’ve got to have some carbs on the side. Homemade garlic bread is my usual pick. It’s amazing for mopping up any leftover sauce, plus that garlic ties in so nicely with the Peri Peri flavors. If I’m in the mood to spice things up even further, I make some spicy rice. That extra zing just takes the whole meal up a notch.
Adding roasted vegetables to the mix really completes the meal for me. They bring a sweet contrast to the spicy chicken, which I love. Sweet corn or bell peppers are my go-tos; they’re not just tasty but also brighten up the plate with their colors.
Storing, Freezing & Reheating
After enjoying a delicious meal of Peri Peri Chicken along with all the tasty side dishes, it’s super important to know how to store, freeze, and reheat any leftovers properly. So, let’s get right into the nitty-gritty.
First off, to store any leftovers, you want to make sure everything cools down to room temperature. Then, transfer the leftovers into an airtight container and stick them in the fridge. This way, they’ll stay good for up to three days. However, if you need to keep them around for longer, freezing is the way to go.
For freezing, you’ll want to do a little prep work. Wrap your chicken pieces individually in cling film or aluminum foil, and then place them into a freezer-safe bag or container. This trick keeps your chicken tasting fresh for up to 4 months. Oh, and don’t forget to slap a label on there with the date!
When the time comes to reheat and dive back into that Peri Peri goodness, you’ve got a couple of options to keep that flavor on point:
- In the Oven: If your chicken is frozen, let it thaw overnight in the fridge first. Then, reheat it at 350°F until it’s hot all the way through.
- In the Microwave: If you’re in a bit of a rush, cover the chicken with a damp paper towel to keep it moist, and zap it on high for 2-3 minutes, or until it’s heated through.

Hi, I'm Benjamin. I love cooking, long walks, and my girlfriend! Here you’ll find simple and delicious recipes that you can make in 30 minutes or less.