These Maseca recipes are my go-to whenever I want to transport my kitchen to the rich, flavorful world of Mexican cuisine.
Maseca, a renowned brand of maize (corn) flour, is your ticket to creating authentic, scrumptious Mexican delicacies.
My culinary adventures have been significantly enriched by the inclusion of this magical ingredient, unlocking a realm of possibilities that range from traditional dishes to modern twists.
For those who are just discovering the wonders of Maseca or those who have long embraced it, I’m excited to walk you through nine easy and delightful Maseca corn flour recipes.
Each recipe is a doorway to a culinary experience filled with zest, texture, and aroma, reflective of the vibrant Mexican culture
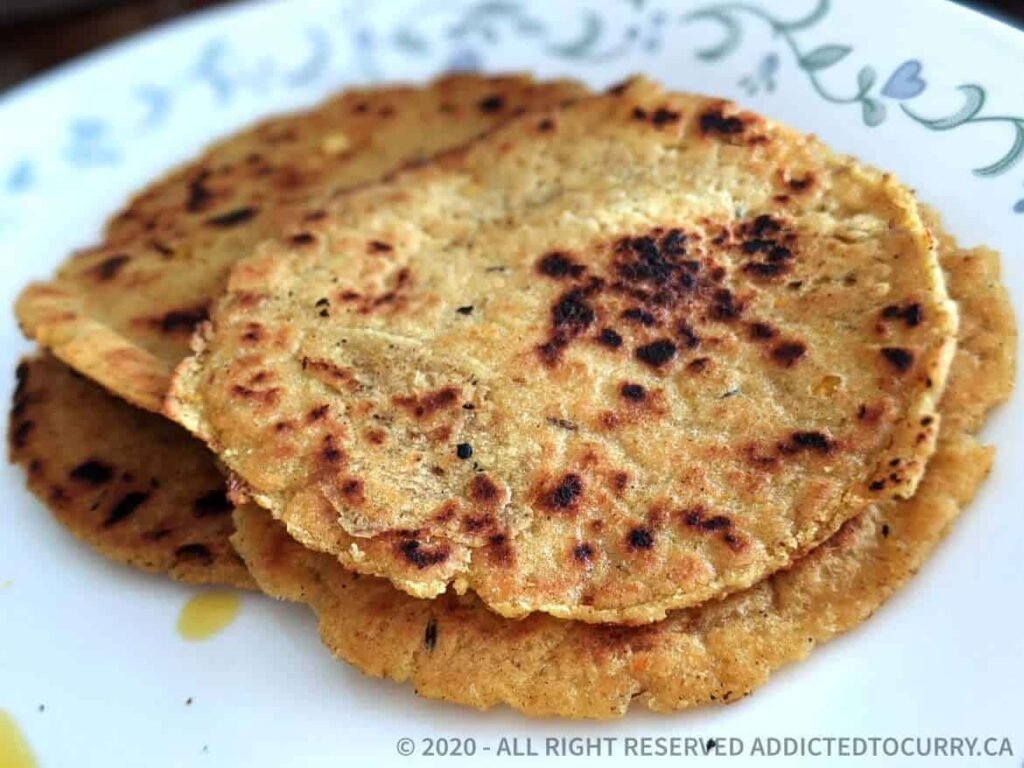
1. Gluten Free Corn Tortillas

Indulge in the simplicity and versatility of homemade gluten-free corn tortillas, a cornerstone of Mexican cuisine. This recipe is not just about creating a staple food item; it’s about crafting an experience.
With Maseca, salt, a dash of oil, and water, you can create soft, warm, and delicious tortillas that serve as the perfect base for tacos, enchiladas, or just about any Mexican dish you fancy.
Ingredients
- 2 cups of Maseca Masa Harina
- 1 tsp of salt
- 1 tbsp of oil
- 1 1/2 cups of water
Instructions
First, gather your ingredients and grab a large bowl. It’s time to combine the Maseca, salt, oil, and water together. Mix and knead them lovingly for about 2 minutes or until you see a lovely dough ball form.
Once the dough is ready, give it some rest for about 20 to 30 minutes. It’s crucial, as this time allows the masa to fully soak up the water and oil, making the dough perfectly pliable.
After the well-deserved rest, it’s time to bring your dough to life! Divide it into small, one-ounce portions—you should get around 18 to 20 little dough balls.
Next, pop a square of wax paper or plastic wrap on the bottom of your tortilla press and place one of your small dough balls right in the center. Cover it with another piece of wax paper or plastic wrap and press gently but firmly, transforming the dough into a beautiful tortilla.
It’s cooking time! Place your formed tortilla on a hot, preheated griddle. Cook each side for a minute, and watch it puff slightly, the aroma tantalizing your senses.
Once they’re done, transfer them to a container to keep them warm and cozy until you’re ready to savor them with your favorite dishes. Enjoy your homemade, gluten-free delicacies, straight from your kitchen.
2. Gorditas Recipe With Maseca

Unleash the flavors of Mexico in your kitchen with these homemade Maseca Gorditas! These thick, delicious, and slightly puffy disks are more than just a treat—they’re a journey through the exquisite Mexican culinary landscape.
Fill them with your favorite toppings like picadillo, cheese, or refried beans, and enjoy a flavorful adventure with every bite!
Equipment Needed:
- 2 plastic sheets + a heavy dish or a tortilla press
- Comal or griddle
Ingredients:
- 3 cups Maseca masa harina
- 2 ¼ cups water (plus additional if needed)
- Salt, to taste
Instructions:
- Mix & Knead: Start by pouring the Maseca masa harina and a generous pinch of salt into a bowl. Pour in the water and use your hands to mix and integrate the ingredients well. Knead until the dough feels manageable, non-sticky, and has a texture similar to play dough.
- Divide: Separate the dough into 12 equal portions and keep them covered with a damp kitchen towel to prevent drying.
- Shape & Cook: Preheat your comal or skillet over medium heat. Wet your hands a bit and shape one portion of the dough into a ball. Place this ball between two plastic sheets. Use a heavy dish or a tortilla press to flatten it into a thick tortilla, around 4.5 inches in circumference.
- Grill: Carefully lay the gordita on the preheated comal or griddle, peeling off the plastic sheets, and let it cook for about 1.5 minutes. Flip it, and cook for another 1-2 minutes or until beautiful dark spots appear.
- Create Pockets: Once off the griddle, swiftly cut a slit on the side of each gordita to form a pocket for the fillings. Keep them warm between kitchen towels.
- Stuff & Serve: Fill the warm gorditas with your chosen delicious fillings—be it picadillo, chicharron, cheese, or refried beans. You can give them a quick warm-up on the griddle with the fillings inside or serve them immediately, brimming with flavors and ready to be devoured!
3. Maseca Corn Flour Parathas

Experience a fusion of flavors with these Maseca Corn Flour Parathas, where the warmth of Indian culinary traditions meets the rustic goodness of Mexican cuisine.
These Parathas are a delightful blend of simplicity and versatility, acting as the perfect companion to your curries or a stand-alone star with some yogurt and pickles.
Ingredients:
- 2 cups of Masa Harina
- 1/2 teaspoon of salt
- 1 tablespoon Canola oil
- 1.5 cups of warm water
- Oil for pan or Tava
Instructions:
- Prepare the Dough: In a spacious bowl, combine masa harina, salt, 1 tablespoon of oil, and warm water. Give them a good mix, cover with a damp cloth, and let it rest for about 5-6 minutes.
- Knead & Shape: Once the dough is ready, knead it with love for around 5-6 minutes. Divide it into small, palm-sized balls—about 2.5 inches each.
- Form the Parathas: Place each dough ball between two sheets of wax paper and gently press down using the base of a large pot, giving them their characteristic shape.
- Cooking Time: Preheat your Tava or griddle and lightly brush it with oil to avoid sticking. Lay the Paratha on it and let it cook for about 30 seconds on each side, flipping it carefully.
- Keep Them Warm: Transfer the cooked Parathas to a roti warmer lined with a cloth to maintain their warmth and prevent them from drying out.
Note: You’ll need a Tava or griddle, wax parchment paper or aluminum paper (remember to oil one side), and a wide, two-handled pot to form the parathas.
Personal Tip: Serve these parathas warm with your favorite curries, or savor them with some yogurt and pickles for a wholesome, flavorful meal.
4. Sorullitos de Maíz

Welcome a piece of Puerto Rican joy into your kitchen with these homemade Sorullitos de Maíz!
These golden, crispy cornmeal sticks are a true celebration of flavor, with the delicate sweetness and savory cheese creating a symphony in your mouth. Perfect as appetizers or snacks, they’re a delightful way to start any meal.
Ingredients:
- 1 1/4 cups of Finely Ground Cornmeal
- 2 cups of Water
- 1 tablespoon of Butter
- 1 teaspoon of Salt
- 2 – 4 tablespoons of Granulated Sugar
- 1 cup of shredded Cheddar Cheese (4 oz.)
Instructions:
- Prepare the Mixture: Place a medium saucepan over medium heat. Into it, add water, a dollop of butter, a pinch of salt, and the sugar. Mix everything well, letting it come to a gentle boil. Gradually whisk in the cornmeal, stirring persistently for around 3 to 5 minutes, or until the mixture forms into a soft, unified ball. Off the heat, fold in the shredded cheese until well combined.
- Cool & Shape: Allow the dough to cool to a manageable temperature. If the dough feels crumbly, a splash of warm water can fix it, and if it’s too sticky, a bit more cornmeal will do the trick. Aim for slightly sticky, lump-free, and springy dough. Grab a tablespoon of dough at a time, smoothing and rolling it into little logs, approximately 3 inches long and half an inch wide.
- Fry to Golden Perfection: Heat oil in a deep pan to 350°F, ensuring it’s at least 1 inch deep. Fry the sorullitos in batches to avoid overcrowding, letting them dance in the hot oil for 3 – 4 minutes or until they achieve a beautiful golden brown hue. Drain the crispy, golden sticks on paper towels to remove excess oil.
- Serve & Savor: Serve these golden delights hot and let your senses revel in their unique, irresistible taste.
Personal Note: These delightful sticks are a taste of Puerto Rican hospitality, a treat that whispers stories of vibrant kitchens and laughter-filled dining tables. Enjoy them as a snack or an appetizer, and let each bite take you on a flavorful journey!
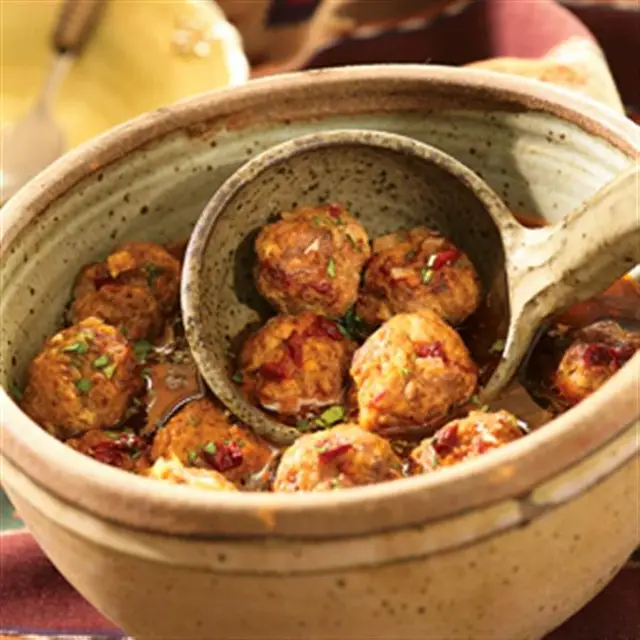
5. Mexican Meatballs

Introduce your kitchen to the warm embrace of Mexican flavors with these Hearty Mexican Meatballs! Infused with the rich aroma of spices and herbs, these meatballs are not only flavorful but also incredibly satisfying.
Whether it’s a cozy dinner with loved ones or a festive gathering, this dish promises to be a crowd-pleaser, delivering a symphony of tastes in every bite!
Ingredients: For 4 Servings
For the Meatballs:
- 1/2 cup of corn masa flour
- 1/2 tsp. of ancho chile powder
- 1 tsp. of salt
- 1/2 tsp. of freshly ground black pepper
- 1/4 cup of warm water
- 1 lb. of lean ground pork
- 1 lb. of lean ground beef
- 1 large beaten egg
- 4 cloves of garlic, minced
For the Broth:
- 1 Tbsp. of Crisco Pure Corn Oil
- 1 cup of minced onion
- 3 cloves of garlic, minced
- 2 Tbsp. of finely chopped chipotle chiles in adobo
- 29 oz. of reduced-sodium beef broth
- 2 Tbsp. of fresh cilantro, chopped
Instructions:
- Prepare the Meatballs: Combine corn masa flour, ancho chile powder, salt, pepper, and warm water in a bowl, creating a smooth mixture. To this, add ground pork, ground beef, beaten egg, and minced garlic. Mix everything together until well combined.
- Cooking the Meatballs: In a large pot, heat the corn oil over medium heat. Add minced onion and garlic, sautéing them until they are soft and golden. Incorporate the chopped chipotle chiles in adobo and let the ingredients mingle for a bit.
- Creating the Broth: Pour the reduced-sodium beef broth into the pot, stirring it well with the existing mixture. Gently drop the meatballs into the simmering broth and let them cook to perfection, absorbing the rich, aromatic flavors of the broth.
- Finishing Touch: Once the meatballs are thoroughly cooked, sprinkle freshly chopped cilantro over the dish and give it a gentle stir.
Personal Tip: Serve these flavorful Mexican meatballs over a bed of rice or with a side of warm tortillas and watch them disappear off the plates! The fusion of spices and the robust broth promise a delightful culinary experience, making it a go-to dish for any occasion!
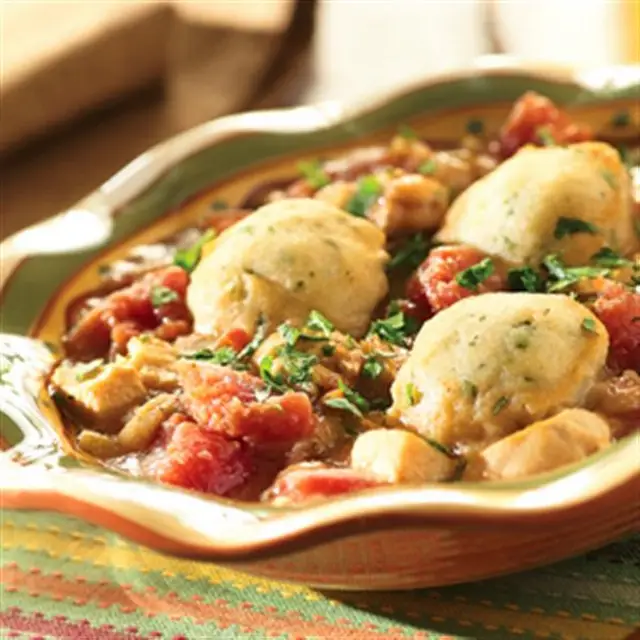
6. Chicken and Masa Dumpling Soup

Wrap yourself in a blanket of comfort with this Cozy Chicken and Masa Dumpling Soup!
This soul-soothing dish brims with tender chicken, flavorful broth, and delicate masa dumplings, offering a hug in a bowl.
It’s the perfect concoction to warm up your days, making it an instant favorite for those chilly evenings or when you crave homely warmth!
Ingredients: For 4 Servings
For the Soup:
- 1 Tbsp. of Crisco Pure Corn Oil
- 1/2 cup of chopped yellow onion
- 2 cloves of minced garlic
- 29 oz. of reduced-sodium chicken broth
- 10 oz. of tomatoes
- 4 oz. of chopped, drained green chili peppers
- 1 tsp. of crushed dried oregano
- 1/2 tsp. of ground cumin
- 2 cups of chopped cooked chicken
- 2 Tbsp. of snipped fresh cilantro
For the Dumplings:
- 1 1/2 cups of corn masa flour
- 1 tsp. of baking powder
- 1/4 tsp. of salt
- 4 Tbsp. of softened butter
- 1 1/4 cups of reduced-sodium chicken broth
- 3 Tbsp. of chopped cilantro
- 1/4 cup of sour cream
Instructions:
- Prepare the Soup Base: Heat the corn oil in a large pot over medium heat. Add the chopped yellow onion and minced garlic, sautéing until they’re soft and fragrant. Pour in the chicken broth, followed by tomatoes and green chili peppers. Sprinkle in the dried oregano and ground cumin and let the mixture simmer.
- Add Chicken & Cilantro: Incorporate the chopped cooked chicken and fresh cilantro into the simmering soup, stirring well to ensure all flavors meld beautifully.
- Make the Dumplings: In a separate bowl, mix the corn masa flour, baking powder, and salt. Work in the softened butter until the mixture is crumbly. Gradually add chicken broth, mixing until a dough forms. Shape the dough into small dumplings and drop them into the simmering soup.
- Final Steps: Once the dumplings are cooked and have risen to the surface, garnish the soup with chopped cilantro and a dollop of sour cream.
Personal Tip: Serve this hearty soup piping hot and feel the warmth and comfort enveloping your senses. The harmony of flavors and textures makes every spoonful a delightful experience, perfect for those times when you need a bit of culinary pampering!
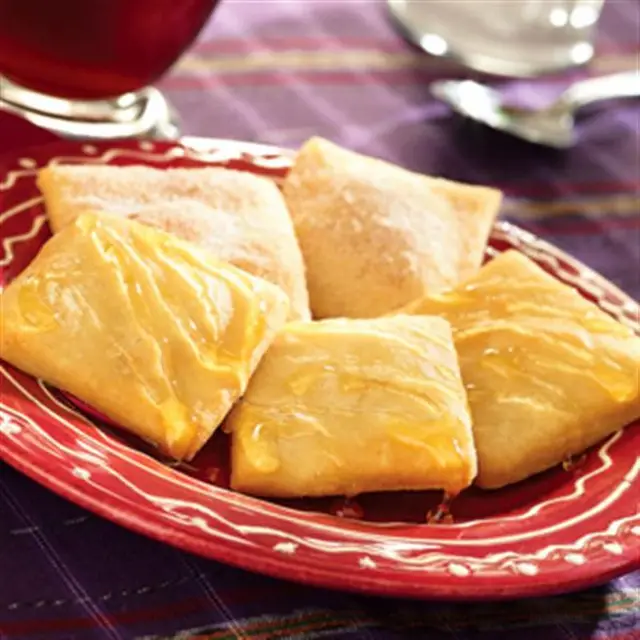
7. Masa Sopaipillas

Indulge in Sweet and Crispy Masa Sopaipillas, a delightful combination of sweet, savory, and crispy textures! Ideal for gatherings or cozy evenings, these lightly fried treats sprinkled with cinnamon and sugar, and accompanied by warm honey, are sure to win everyone’s heart!
Ingredients:
- 1 cup Corn Masa Flour (white)
- 1 cup All Purpose Flour
- 1 tsp. Baking Powder
- 1/2 tsp. Salt
- 2 Tbsp. Vegetable Shortening
- 1 cup Warm Water
- Corn Oil, for frying
- 6 Tbsp. Sugar, for sprinkling
- 3/4 tsp. Cinnamon, for sprinkling
- Powdered Sugar, optional, for dusting
- Honey, for serving
Instructions:
- Mixing the Ingredients: In a medium bowl, blend together corn masa flour, all-purpose flour, baking powder, and salt. Integrate the shortening using a pastry blender or fork until the mixture forms pea-sized crumbles. Slowly mix in the warm water until a dough ball is formed. Allow the dough to rest by covering it for around 20 minutes.
- Rolling and Cutting the Dough: On a lightly floured surface, roll out the dough into a 12 x 12-inch square, maintaining a thickness of about 1/4-inch. Slice it into 16 equal 3 x 3-inch squares.
- Frying the Sopaipillas: Heat 2 to 3 inches of corn oil in a 4-quart saucepan or a deep fryer to 375°F. Carefully fry 2 to 3 sopaipillas at a time, turning them once, until they turn golden brown. Remove them and let them drain on paper towels.
- Adding the Finishing Touches: Mix sugar and cinnamon in a separate small bowl. Sprinkle or toss the warm sopaipillas with the cinnamon-sugar mixture or dust them with powdered sugar. Serve them warm, and for an extra layer of sweetness, drizzle them with some warm honey.
Tip: Enjoy them while they are still warm to experience the full richness of their texture and flavor! They are best consumed immediately but can be reheated if needed.
9. Masa Harina Biscuits

Indulge in these fluffy and delicious Homemade Masa Harina Biscuits that bring together the creaminess of buttermilk, the sweetness of honey, and the distinctive taste of masa harina.
Perfect to enjoy hot out of the oven with a dab of butter or a drizzle of honey, they make for an amazing breakfast or a delightful snack at any time of the day!
Ingredients:
- 1 1/4 cups Cold Cultured Buttermilk
- 1 Tbsp Honey
- 2 cups All Purpose Flour
- 1 cup Masa Harina
- 1 Tbsp Baking Powder
- 1/2 tsp Baking Soda
- 1/2 tsp Salt
- 12 Tbsp Cold Salted Butter, cut into pieces
Equipment:
- 2 1/2 inch Biscuit Cutter
Instructions:
- Setting the Stage: Preheat your oven to 425°F.
- Preparing the Buttermilk: Mix together the cold cultured buttermilk and honey and then set it aside for later use.
- Mixing Dry Ingredients: Combine all the dry ingredients, namely, all-purpose flour, masa harina, baking powder, baking soda, and salt, in the food processor bowl and give it a few pulses to integrate them well.
- Incorporating Butter: Add the pieces of cold butter into the bowl and pulse around 25 times until you have a coarse, crumbly mixture.
- Forming the Dough: Gradually introduce the buttermilk mixture while continuing to pulse until a dough forms. If the mixture is too sticky, dust it with a bit more flour.
- Shaping the Biscuits: Lay out the dough on a floured surface and either pat or roll it until it is about 1 inch thick. Using a 2 1/2 inch biscuit cutter, cut out your biscuits, you should be able to make around 10 or more. A tip: flouring the cutter between each cut avoids sticking!
- Baking: Arrange them on a baking sheet lined with parchment paper or a Silpat liner and bake for approximately 15 minutes. Keep in mind, they don’t brown much, so avoid overcooking, waiting for a color change.
- Serving: Enjoy them fresh and hot from the oven, either plain or with some butter or honey! They are a treat to the senses and are sure to leave you longing for more!
Tip: They are best when fresh but can be reheated in the oven if needed to revive their wonderful texture!
Jenny has always been passionate about cooking, and she uses her platform to share her joy of food with others. Her recipes are easy to follow, and she loves giving tips and tricks to help others create their own unique culinary creations.

